Help:Teachers/Starting
This page suggests a practical and brief guide about the main adviced steps to start using Wikimini with your class.
Contents
Introduce Wikimini to the class
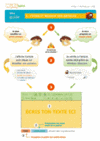
Explain to your students the point and function of Wikimini. To help you, you can for example use :
![]() You can also invite your students to discover the website by themselves, for example by creating an article at home.
You can also invite your students to discover the website by themselves, for example by creating an article at home.
Creating an account for each student
It is strongly advised that each student has its own account on Wikimini (even if your student might work together on a same article). This will give them more responsability and will allow you to follow precisely everyone's contributions.
To start their account, students must choose :
- a username
- a password
![]() The following document (printable) will guide your students for this step that only takes a minute.
The following document (printable) will guide your students for this step that only takes a minute.
Create your own account
If you haven't done it yet, create your own personal account. This way, you will be able to intervene in articles ; and you will have a personal page and a watchlist that will be useful later.
Write your personal page
Once your account created, you can write your personal page. In this page, you can for example introduce yourself and create a table ![]() listing all your students and their articles.
listing all your students and their articles.
Example of personnal page
Ongoing or completed projects :
> Project « Animals » : June-July 2008 (completed)
| Student | Username | Ongoing article(s) |
| Laurent J. | Lorangeo | Octopus |
| Charlotte F. | CharlieFierro | Bee |
| Julien S. | Zztest6 | Sloth |
Of course, all of this is is optional, but it will allow other Wikiminauts to better understand and welcome your students' contibutions, and possibly to advice or help you if necessary.
Get started
Your students are now able to contribute to Wikimini. For example, to begin, they could create their own personal page to introduce themselves.
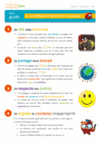
![]() The following documents (to print) will help students starting out on Wikimini. Put them on display next to the computers.
The following documents (to print) will help students starting out on Wikimini. Put them on display next to the computers.
 |
 |
 |
Mark a school project
Explainations
When you're planning to work for a while on an article with your students, you can mark it as a « school project ».
Edit the article's page, and then, in the toolbar, click on « Insert > Template ». Look for the « School project » template and fill in the required fields. A scroll similar to this one will then be added on top of the article :
This way, you will be able to work on any article you want, as well as follow and appreciate your students' contributions ; without other Wikiminauts intervening in said articles.
Furthermore, by using this template, all the articles your students are working on will automatically be listed one the « School project » page, wich will make following them easier.
![]() Advice : When your students indicate your username in the « School project » scroll, make sure they write it the exact same way you registered it when creating your account (if necessary, see the user list). You can just write it on your classroom's board !
Advice : When your students indicate your username in the « School project » scroll, make sure they write it the exact same way you registered it when creating your account (if necessary, see the user list). You can just write it on your classroom's board !
Three simple conditions
To mark an article as a school project :
- The teacher or the person in charge needs to have their own Wikimini account.
- On their personal page, the teacher or person in charge can specify their role (teacher, librarian, intern, ...) and briefly expain what their students are going to do on Wikimini.
- Once the work is done on an article marked as a « school project », you will need to delete the scroll to allow other Wikiminauts to contribute (please don't forget to delete it !).


 Views
Views

 Tools
Tools 


 Personal tools